Showing posts with label stamped card. Show all posts

Wednesday, September 28, 2011

Another Flower Card


I just can't help it...I love to make flowers! The petals are from an old book, I took a page & put it onto a cricut matt & cut it with our Art Philosophy Cricut Cartridge. Once cut, use your inks a sponge and colors that match your pattern paper. This paper is from our"Wonderland" paper pack. Pretty blues & purples.

Stay tuned...More flowers soon!

Friday, August 19, 2011

It's so exciting when we get a new catalog! We wonder what colors will be in the new paper kits. What patterns, will we like them? What new accessories will there be? There is such a build up of enthusiasm before it's release. I'm so thrilled with this seasons catalog! (released August 1) Beautiful color mixes, wonderful new patterns, fun new accessies and an exceptional offering of stamps & crafting supplies to explore and express your creativity. The card below was made with the new "Dreamin" Paper pack. I love the bold varity of colors & prints in this kit.
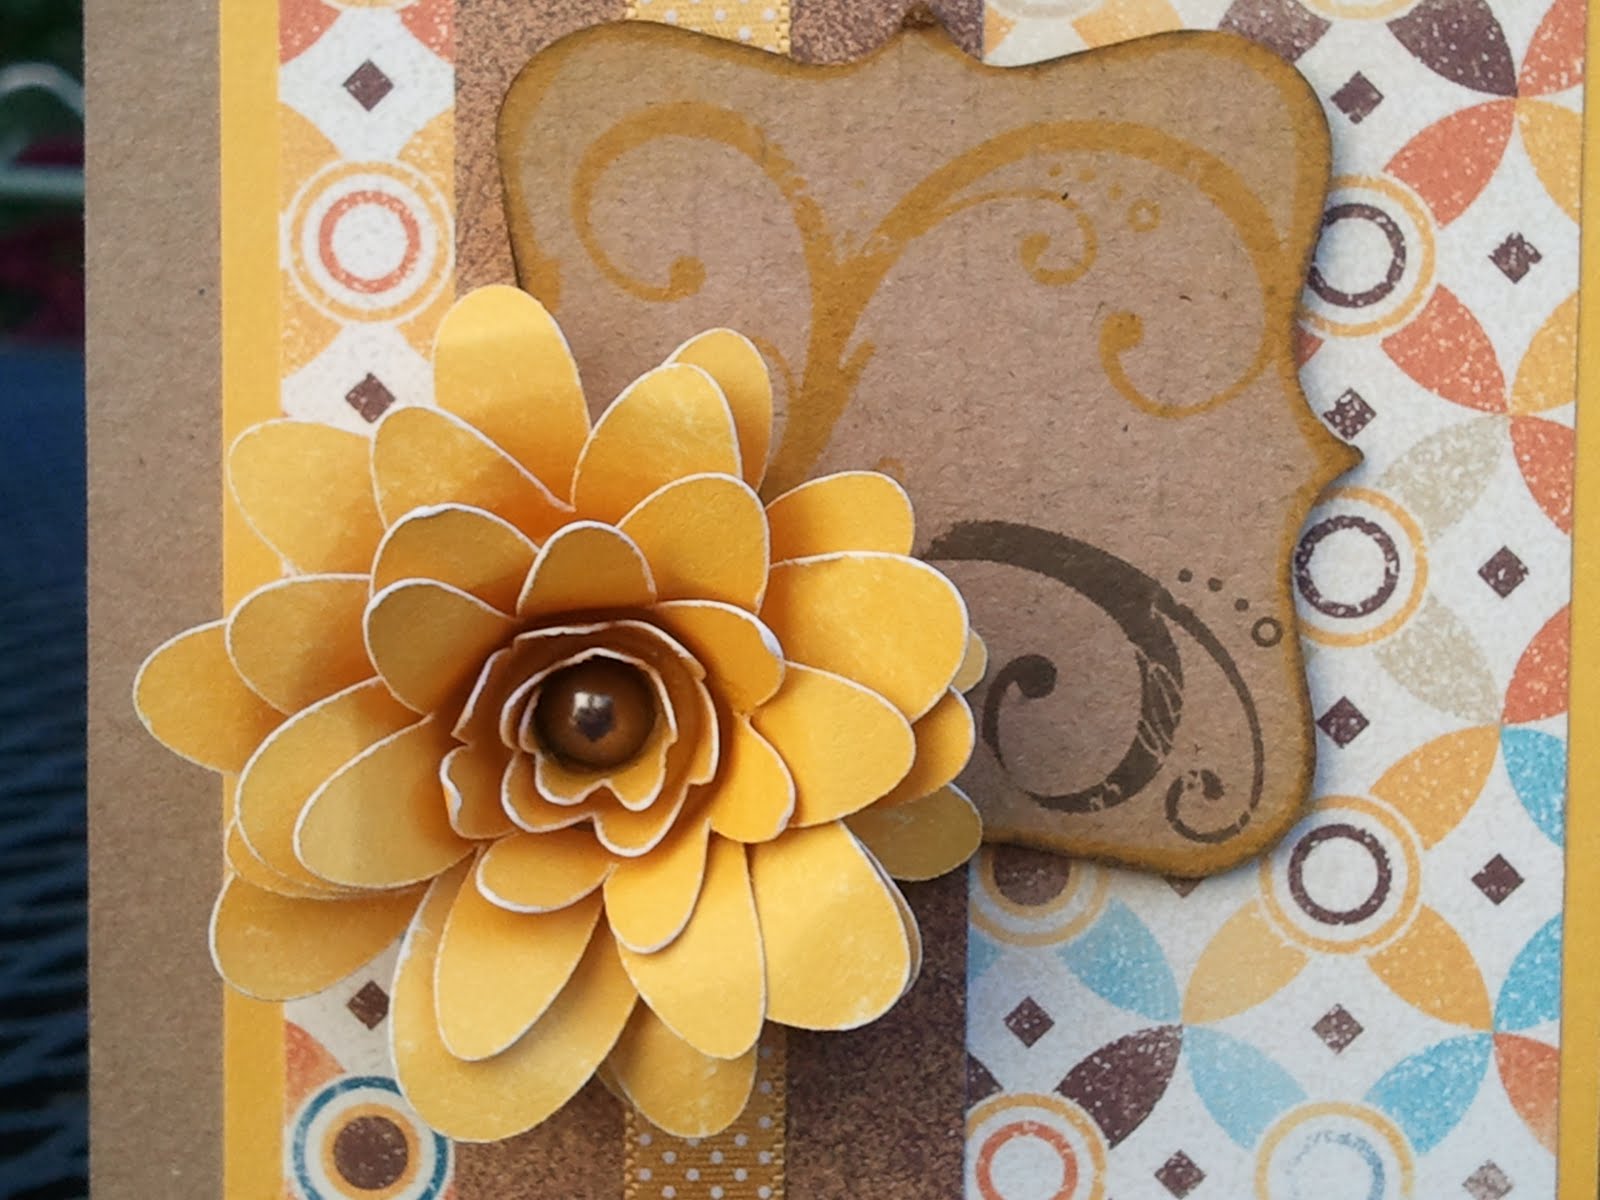
I sooo cannot leave the new cricut cartridge alone! Just another 3D flower cut from Honey CS, rolled up and petals curled with a "Mocha Pearl" in the center. The frame below is one of the "Milepost Shapes" flipped over & stamped on with a flourish image. I followed the color challenge from CR84FN.


Chic new paper pack!

The "Roxie" Paper Pack is Chic & fun! Check out the flourishes & flowers and make sure to see the black-n-white zebraish (is that really a word?) print.  I predict this trendsetting paper pack will be a best seller!

The floral image is from "The Present" stamp set and the sentiment is from "Unscripted"  
This card design is a template from Clean & Simple Stamping & they have teamed up with CAS-ual Fridays for this sketch.

Isn't the Zebraish (I like my made up word!) print jazzy! Combined with our Smoothie (pink) it looks awesome! The frame, flowers, flourish & border were all cut on the cricut using the CTHM "Art Philosophy" cricut cartridge. To give the flower some zing I added our transparent acrylic pearl paint (create a shade), mixed it with a little water and painted the petals, waited for it to dry & then added a little Glitz Glitter Gel to the edges of the petals & boarder around the sentiment. For the center of the flowers a pearl is perfect! It's from our Opaques Adhesive Gems. This card was fun to make & I love how it turned out!  

Here's a close-up of the flowers so you can check out the details.

Thursday, August 18, 2011

I Just Love Purple

The rich colors are so lovely in this elegant patterned paper from our new "Sonoma" paper pack. The beautiful tapestry designs and subtle coordinating patterns combined with my favorite colors; Smokey Plum, Amethyst, Pansy Purple & Olive Green complete this paper package. 


OK so I love anything with writing on it! This is just one of the sizes & patterns from our "Just Blooms Flutter Paper Shapes." They come white with several different prints then you just add the ink that cooridnates with your paper pack & you have a breathtaking embellishment. Make it "pop" by adding glitter & rhinestones. 

Did I mention how much I love our new "Art Philosophy" Cricut cartridge! The sentiment frame, 3D flower, leaves & scallop boarder were all cut from my new "go to" Art Philosophy cartridge. It's so easy to make these flowers with our cartridge, just cut it out & roll it up. Fiddle with petals a little & glam it up with glitter & a rhinestone "Ta Da" you have a gorgeous embellishment for your card or altered paper project. 


I played along with "The Sweet Stop" Challenge Sketch Blog when I made this card. I like their sketches, they are clean and balanced.This sketch was a great inspiration for my card.


Tuesday, August 16, 2011

More Great Artwork


I remember when my kids used to hug! This paper kit is called "Elemental" It's such a great kit because it will go with everything! Very basic subtle patterns that will work with any theme.

Oh Gosh! Some of you know how much I love Halloween! This new "Mischief" paper pack is awesome! We also have fun new felt designs to go with it! Check out the tree, fence, corner design, black mat behind the bat & chandler on the card. They are wonderful quality & add texture to any layout or card. Make sure to check out the new colored rub-ons for this halloween kit! I can't believe it...we have colored rub-ons!! I love rub-ons & now we have them in color! Yippie!

Monday, August 8, 2011

New Paper Pack artwork

Our Corporate artist are so awesome! I love these layouts!
This is from the new Roxie paper pack! Don't forget that our pattern paper is now Cardstock weight. It also has a zip strip across the top with a design that coordinates with the paper pack & the opposite side names the colors that are in the pack. With a heavy paper cutting it on the cricut will be a breeze!

This picture doesn't show how pretty this "Dreamin" paper pack really is. It has rich fall colors & beautiful designs. I can't wait to work with it. Plus most of leaf images on the stamp set that match are cricut cutable. Can I just tell you again how happy it makes me not to have to get my scissors out!!

Thursday, June 30, 2011

Wedding Card

I'm still in the "Wedding mode!" This Bliss paper pack...it inspires me. it's soft & pretty & oh so easy to make beautiful cards! Enjoy a quick post today, Hope you like it.

Saturday, June 18, 2011

It's Wedding Season!

Sooo... some of you who know me, know of my annoying habit of being a little (or sometimes a lot) late. Well, I'll tell ya that no matter what I do I can't seem to be on time! I had these 2 cards (plus a couple of more) done, pictures taken & edited, they where ready to go on my blog & what happens so I can't be on time to join the site challenges I made them for??? Our internet goes wacko! I t 's   g o i n g   v e r y   s  l  o  w .  (Get the picture!)  So slow I couldn't get it to upload the photos here. So I thought it was just a glitch & it will be fine in a couple of days (cuz our internet is very temperamental) Well...It just got worse so finally I called it in & after a few days of phone calls & trying to walk me through fixing things over the phone they said we needed to update our equipment. We'll be there Thursday...yah, that day came & went, then we'll be there Friday...yup that day came & went too! (Well by now I missed most of the deadlines for the challenges) So on Monday I was reduced to begging. It's now been about 10 days without internet. Yesh you forget how much you depend on it! But all is well (I think) in the end because we are updated & back on line. It still seems to have a few fits & sometimes a little slow but at least we (yes, I had a lot of frustrated kids who couldn't check there facebook! Oh No!!) can get on line again! So if you've missed me that's what's been causing the lack of posts! But I'm back & have a lot of artwork to share!
Pretty, Pretty, Pretty! What more can I say! I love flowers & flourishes! This is a new flower for me, I have seen it a lot on other sites but haven't tried it until now. The ribbon is rolled & twisted & sewn together. The bottom layer is lace, then Blush Cardstock punched with our scallop punch, sanded, bent & inked then cut apart to make larger & glue dotted back together. (Sounds like Humpty Dumpty!) The design is from Mojo Monday & the paper is from the "Bliss WOTG Kit." I did a lot of edging with blush ink & chocolate ink. My sewing machine happened to be out so I added some stitching. I like that & think I should add stitching to my projects more often. The brown paper is our new "Kraft" CS & the boarder is from the coordinating "Kraft Color Ready Borders."

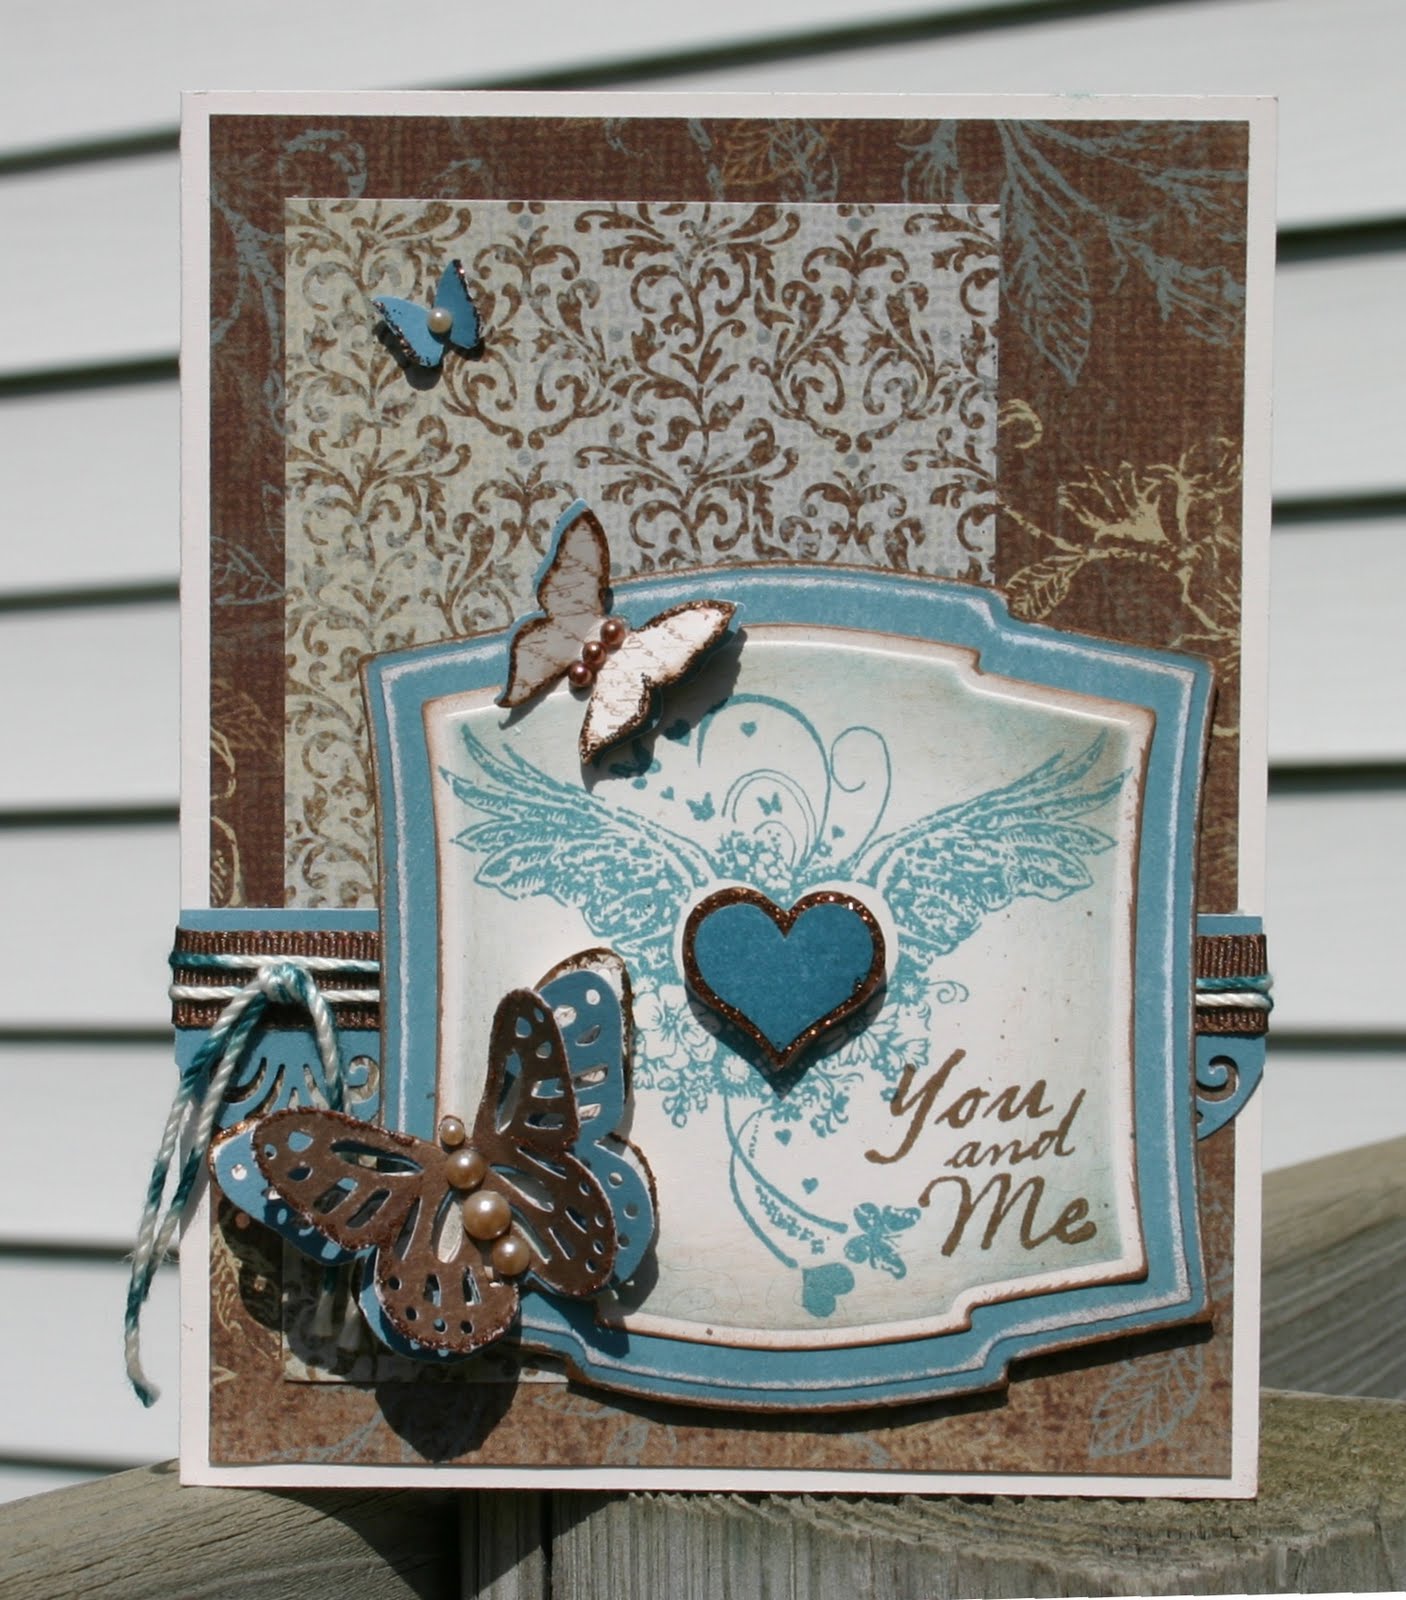
The design below is from Sweet & Simple Challenge blog. Again I used the "Bliss" paper pack & Kraft CS. The butterfly is a Martha Stewart punch. It's so pretty when you double or triple it. Not only does it add dimension but it appears to be in flight & gives movement to your project! You may not be able to tell (click on the photo & it will enlarge it) but I added glitter to the flower centers & butterflies. The stamp set is from our special this month "You & Me." It's a lovely kit including: irresistible chipboard, stamp set, ribbon & paper. Very versatile heavy weight paper (new for us) patterned on both sides & the stamp set is awesome...of course it has a great flourish in it! Close to My Heart is donating a portion of the profits from this kit to add in the flood & tornado relief operations. Read Below!


You & Me Kit

Severe flooding, tornadoes, and storms have affected the lives of thousands across the United States, but together we can make a difference.

Purchase the You & Me scrapbooking kit for only $15.00 US/ $16.50 CAN (a retail value of $34.95/$38.95), and a portion of the proceeds will be donated to the Red Cross Spring 2011 Floods and Tornadoes relief operations. With the You & Me kit, you’ll create two fully embellished two-page layouts using the included instructions, papers, D-size stamp set, and accessories. At only $15/$16.50, this kit is more than 50% off the retail price. You’ll win by getting the kit at a phenomenal price, and those in the weather-devastated regions will benefit from your charitable contribution. Together we can make a difference; together we are stronger!

Offer valid June 1–30, 2011, or while supplies last. No qualifying purchase required. Tax and shipping/handling charges apply.

Tuesday, May 17, 2011

A couple of more "Miracle Kit" cards

I guess I just can't get enough of this paper! It's very pretty & seems to work with any theme. Both of the patterns for these cards came from MOJO Monday. I completed them to late to enter in their contest & links, but I do love the way they turned out. I seem to always step it up a notch when "Mojoing!" (Is that a word??!)
The large flower is a rolled rose. I started with a ripped piece of colonial white & edged with Sky ink. I also curled the ripped side of the paper. The rose adds beauty & charm to the card with a rhinestone in the middle. The light blue scalloped edge is one of the patterns from our "Kraft Color Ready Borders" I put Heavenly Blue embossing powder on the sticky side of the scallop & heated it. I love the crackled effect it created.
This is one of my favorite cards! I made the flower with our 2" scallop punch & a folding technique. The flower center is one of our colonial white designer brads with our small pearls surrounding it & one in the middle of the brad. The flower wasn't as big as I wanted so I punched out 4 more Chrystal blue scallop circles & distressed them by sanding & curling the edges & placed them around the underside of the flower to create larger petals & more of a dramatic look. I wanted the flower to be the focal point of the card. The leaves are free handed with dry embossing, wrinkling & sanding so they look more realistic, they are edged with a touch of dessert sand ink. We can't forget my favorite embellishment...chipboard! Especially our "Miracle Dimensional Elements" with an resist pattern already on them, just add coordinating ink and Wallah" you have a beautiful matching 3 dimensional embellishment. (I also added pearls to it for the body) The scallop border is from our "Kraft Ready Borders." this is the first time & tried the wrinkle technique with the ribbon. It's so easy; tie your bow & gently & slowly heat it with your heat gun & it will shrink irregularly adding a shabby chic look to it. I can't wait to give these cards to graduating seniors this year!

Wednesday, May 4, 2011

Miracle Scrapbook Pages & More


Our Corporate Artists are so talented! I'd like to share some of their creations with you. I guess I can't get enough of the "Miracle Paper Kit." I especially love how they incorporated our new Canvas Buttons, Kraft Borders & Miracle Chipboard into these amazing layouts & cards.

The pinwheels are adorable. Stamp them with the exclusive B-size set that comes in the WOTG (Workshop on the Go) Kit. Then cut & fold. Easy Peasy!

Tuesday, May 3, 2011

Here's the promised artwork with the "Miracle" Paper Kit! Such pretty blues & greens. I've paired the paper with one of our newer stamps sets "Dreams Come True." Of course I like it because it has a Great(!!) Flourish! (Used behind the chipboard flower)I'm also very pleased with the sentiment & font chosen. I added Crystal Blue ink onto the chipboard "Irresistible" then edged it with a sponge & Desert Sand ink. It's finished off with a sparkle. Gotta love the bling! The white flower & stitching on the chipboard are part of the resist technique that make these "Irresistible" Dimensional Elements so much fun to work with, you just rub color on with a sponge & ink & wipe of the resist area clean & Ta Da it adds instant visual "Pop" to your piece. These 3"x 3" cards are the perfect size to accompany a small gift or fit into a gift bag. Quick & easy to make to show your appreciation to that someone special in your in your life.


I wish I had a better picture of this card. It is so much prettier than it looks. The design is from "Mojo Monday."(turned sideways) I second generation stamped in the circle very lightly with the large damask stamp from the Feb. SOTM set & then stamped my sentiment (from the Card Chatter-Sympathy set) over top. It's matted with Sweat leaf & Heavenly blue CS & then I ruffled paper under it & added pop dots.


Tuesday, April 5, 2011

April SOTM Artwork


These beautiful cards were made with our April SOTM by a fellow CTMH Consultant, Karen Pedersen. I think they are sooo pretty. I never would have thought to use these colors & I love the combination! Cotton Candy & Chocolate (mmmm sounds yummy!) "

Check out the details; beautiful coloring & shading, white embossing, placement of flowers with our brads & buttons, sanding & then tone on tone random stamping. Look at the way she incorporated our new "kraft borders" with a cotton candy strip underneath so the color shows through the design & by adding "Clear Sparkles" where the design meets. The kraft borders are fun, quick & easy to use & add flair to your cards & pages. Thanks Karen for such wonderful inspiration!


This is the April SOTM. It comes on a 6" x 6" carrier sheet. Don't forget that this month has all kinds of specials! "Lovin' Level 1", Studeo J & the SOTM. if you purchase $100. in product you get the SOTM (above) for FREE & a level 1 paper pack FREE, that's $32.90 in FREE PRODUCTS!! WooHooo!

Tuesday, March 22, 2011

Open Your "Wings" & Soar!

Look at what we found! While we were packing our camper to go away for the weekend a bird kept flying out of the tree at us every time we walked by with another load for the camper. After a while I thought she must have a nest in there & look what we found. How sweet is that! Two newborn chicks & two eggs unhatched.
New chipboard...Yippie! You have to check out the "Irresistibles" Dimensionals elements. The pattern is clear embossed on the letters and all you need to do is add ink! They are awesome! (This is one of my favorite items in the new catty) When our new catalog came out & I saw the "Wings WOTG" kit I new just the pictures to use with this paper. The "My Stickease" were a perfect match for my photos. Some of you know that I usually have a hard time with stickers, but...these were perfect. I did add some ink to them, I know what you are going to say..."She's got to cover the white space!" Yup that's me! I always seem to alter them in some way & just have to use my stencil brushes or sponges! The bird is a stamp rolled in several colors of ink & cut out. I only adhered the body to the sticker tag to leave movement in his wings. When stamp rolling aways start with your lightest color (sweat leaf) & then roll other colors (blush, & vineyardberry) onto the edges of the stamp. Very pretty effect when using leaves & flowers.

The flowers are from our "Just Blooms Spring Blossom" pack & "White Daisy" Variety Pack. Just sponge a little ink in the middle & around the edges & wala you have a beautiful flower to match your layout or card. The White Daisy flowers are on sale right now on my website. Be sure to check the "While Supplies Last" clearance center as there are even more goodies (lots of great ribbon & flower packs) marked down to 75% off!! Whoo Hoo! The gorgeous centers of the flowers are our "Filigree Charms." Aren't they amazing. They come in a package of eight and are pewter charms with brads. I rubbed them across brown StazOn ink & set them aside to dry. It creates a vibrant coppery color. You have to use a permanent ink (like StazOn) as it will work on all nonporous materials such as; metal, plastic, glass, coated paper and more.


Look at the flourishes in these letters! I love it! (Imagine that!) Yes, this stamp set, "Bohemian Alphabet" is something I had to have. With clear blocks & clear stamps our alpha sets are so easy to use. Just stick all the letters you need to make your word on the block & you can easily stamp them right where you want them every time! No more lopsided letters or place a stamp tool. Once again our My Acrylix stamps are "Faster, Simpler & Easier!"


The card below is one of my favorites. When I get started making tag backgrounds I generally make a bunch of them. You never know how the colors are going to blend until they dry. Once I get started & see how pretty they are, I think "What will these three colors look like together" & before you know it I have 50 tags in different colors! I'm actually at a point were I need to make more. I've used almost all of them up! This one had just the perfect colors for the Wings paper. If you would like to have a workshop on how to make these tags let me know & I will put something together.
The butterfly & sentiment are embossed with "Black Embossing Powder. It really is a striking effect. This Stamp set has a place in my heart as it is just my type of design! It was the January SOTM (Stamp of the Month) "Find Your Style" I hope they add it to our inventory in the next catalog.

Thursday, March 10, 2011

March SOTM Sensational Season

Look at how great the Mayberry papers go with the Beatrix Potter inspired March Stamp of the Month. The adorable bunnies in the stamp set with the fresh colors of the paper make me long for spring. Warm weather? Yes, please!

The stamped image is brought to life with the use of our wonderful Watercolor Pencils. They really create a fluid look by blending with water, yet giving you the control of a pencil. See how the dress of the Mother Rabbit has a pattern toBold it? This effect is created with a great technique called paper piecing. To recreate this idea start by stamping your image on a piece of cardstock( this is your base). Stamp the same image again on patterned paper, and cut out the parts you want your image to have with that particular pattern. Repeat with other patterned papers until you have all the pieces you want. Then simply glue your pieces to the base image to create a singular, striking focal point.
Bold
CTMH products used: March Stamp of the Month, Colonial White Cardstock, Mayberry Level 2 Paper Packet, Black ink, Watercolor Pencils, and Micro-Tip Scissors

Learn how you can earn the March SOTM: Sensational Season D1415 at a discount, or even for FREE by clicking here or on the "CTMH Specials" tab located at the top of my blog. Don't forget Hop on over to My Website to grab your own supplies to recreate this card and other amazing products from Close to My Heart.